Edge Lighting:
Figure 1: edge lighting with one strobe (side view or top
view, depends on what type of lighting you want: balanced or
unbalanced.)
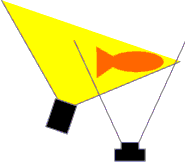
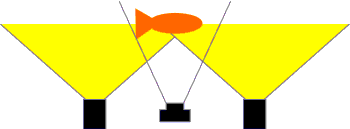
Figure 2: edge lighting with dual strobes (top view)
What do you see in the diagrams above?
Answer: the subject (orange fish) _is illuminated_
and the most of the water between the lens and the subject
_is not illuminated_.
What does this do for your pictures?
Answer: if your strobes are aimed correctly, it can
eliminated alot of the backscatter even on those murky
<5' vis days we sometimes get in monterey.
What's backscatter?
Answer: Out of focus and illuminated stuff (light blobs
shaped like the aperture of your camera's lens) in the water
between the subject and the camera lens.
To use this technique, you have to visualize the cone of
light your strobe projects when fired.
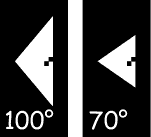
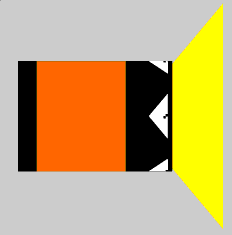
Strobe beam angle visual aid
Figure 3: examples of strobe beam angle visual aids
Why
- gives you a quick visual confirmation of the cone the
strobe will cover
- allows you to better visualize what the strobe will
illuminate when fired
What you'll need:
- white electrical tape (3/4" wide)
- an exacto knife
- a protractor
- a piece of scrap plastic
- the backing from a plastic sticker
Instructions:
- cut a 5 or 6 inch piece of white electrical tape
- stick it to the sticker backing making sure to keep
it straight lengthwise
- look up the beam angle of your strobe (B_angle)
- divide the beam angle by two (X = B_angle/2)
Figure 4: Cutting the visual aids from the white
electrical tape
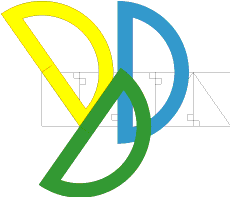
- place your protractor on the long edge of the tape so
that it reads 90 minus X degrees (yellow protractor) and
make a cut with the exacto
- flip the protractor and place it on the opposite side
of the tape where the first cut ended (green protractor)
and make your second cut
- repeat previous two steps until you have four
triangles per strobe
- set you protractor to 90 degrees and make the
centerline cuts on each triangle (blue protractor)
- place the cut pieces of tape on your strobe at 90
degrees to each other with the center line of the
triangle on the centerline of the strobe (see figure
5)
Figure 5: Strobe with visual aids in place
See how the cone of light matches the visual aid.
|